You popped the cover or walked into the backyard and found a swamp. The water is green, the walls are slick with algae, and the filter looks like it hasn’t run since the last administration. That pool is not dead.
Neglected pools are one of the most common problems new homeowners and returning seasonal pool owners face. The restoration process is not glamorous, but it is systematic, and most pools can be brought back without a full drain or a contractor.
Skip a step or handle the chemicals in the wrong sequence, and you will spend extra weeks and hundreds of dollars undoing the damage. Follow the process below and you will have a clean, balanced, swim-ready pool within one to two weeks.
Table of Contents
- What “Neglected” Actually Means
- Step 1: Assess Before You Act
- Step 2: Clear the Debris
- Step 3: Inspect and Backwash the Filter
- Step 4: Test the Water Chemistry
- Step 5: Shock the Pool
- Step 6: Run, Brush, Repeat
- Step 7: Algae Removal Protocol
- Step 8: Drain vs. Acid Wash vs. Resurface
- Step 9: Final Balance and Safety Check
- Step 10: Prevent the Next Neglect Cycle
- Conclusion
What “Neglected” Actually Means
Not all neglected pools are the same. A pool ignored for six weeks looks different from one abandoned for two years, and the restoration approach changes accordingly.
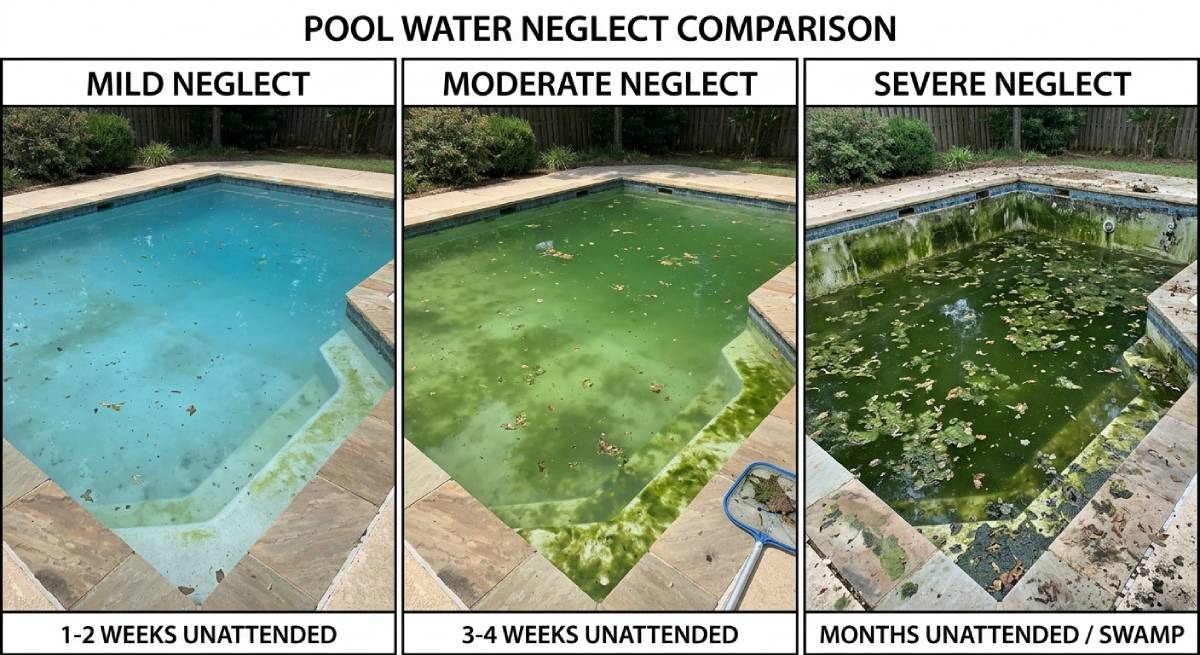
| Neglect Level | Water Color | Visibility | Typical Fix |
| Mild (weeks) | Cloudy/hazy | Partial | Chemical rebalance + shock |
| Moderate (1-3 months) | Green | None | Shock + algaecide + filter run |
| Severe (3+ months) | Black/dark green | Zero | Drain, acid wash, refill, rebalance |
| Extreme (1+ year) | Black + debris | Zero | Professional assessment first |
Identifying your level before spending money on chemicals is the first real decision point of this process.
Step 1: Assess Before You Act
Walk the perimeter and note what you see. Look for cracks in the shell, broken tiles, a collapsed or corroded pump housing, and visible staining on the walls.
Check the equipment pad. If the pump motor is seized or the filter tank is cracked, there is no point adding chemicals until those components are replaced. Running chemicals through broken equipment wastes money and can be dangerous.
Take a water sample from elbow depth (not the surface) and test it for pH, chlorine, alkalinity, calcium hardness, and cyanuric acid. You need this baseline to calculate what you are actually dealing with.
Step 2: Clear the Debris
Use a leaf net, not a fine mesh skimmer, to remove large debris. A fine mesh will clog in minutes on a severely neglected pool and make the job ten times harder.
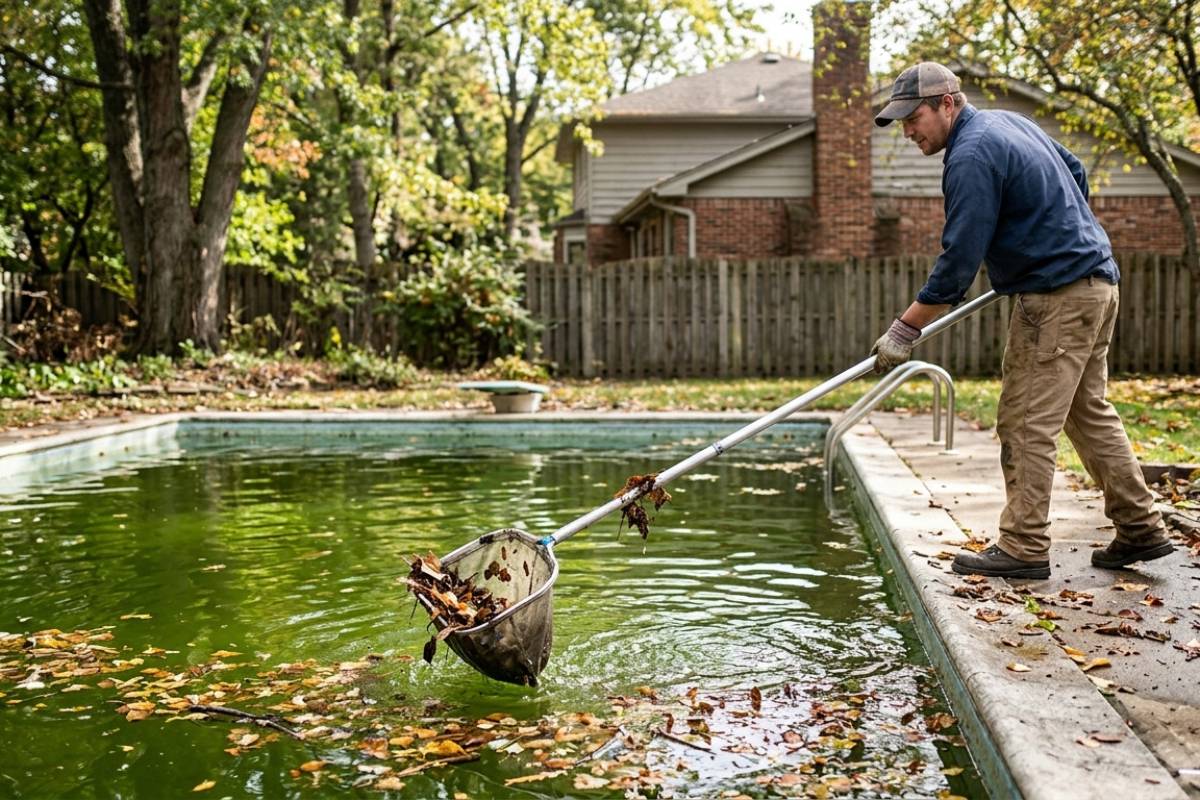
Remove as much organic matter as possible before shocking. Leaves, insects, and dirt consume chlorine. Every pound of debris left in the pool is a chlorine demand you are paying for without getting the result.
Do not vacuum to waste yet. That comes after the initial shock cycle.
Step 3: Inspect and Backwash the Filter
Before adding a single chemical, verify the filter is functional. A clogged or broken filter will not clear a neglected pool, regardless of how much product you add.
For sand filters, backwash until the sight glass runs clear. For cartridge filters, remove the element and rinse it with a garden hose; if the folds are torn or compressed, replace it. DE (diatomaceous earth) filters need a full backwash and a fresh charge of DE.
Run the pump for 15 minutes after backwashing and confirm water is circulating from the return jets. If the pump is airlocked, prime it manually. If it is tripping the breaker, do not restart it without an electrician.
Seized pump motors, tripped breakers, and cracked filter tanks are pool equipment repairs that fall outside safe DIY territory and require a licensed technician before the restoration process can proceed.
Step 4: Test the Water Chemistry
Use a reliable test kit, not test strips alone. Strips give a rough read; a drop test or digital photometer gives you numbers accurate enough to dose correctly.
Target ranges before shocking:
- pH: 7.2 to 7.6 (aim for the lower end before shocking)
- Total Alkalinity: 80 to 120 ppm
- Calcium Hardness: 200 to 400 ppm
- Cyanuric Acid (CYA): 30 to 50 ppm (outdoor pools)
If CYA is above 80 ppm, chlorine becomes increasingly ineffective regardless of how much you add. High CYA from years of stabilized chlorine tablets is one of the most common reasons shock treatments fail. A partial drain to dilute CYA may be necessary before proceeding.
Adjust pH and alkalinity first. Chlorine’s effectiveness is directly tied to pH. At pH 8.0, chlorine is only about 20% active. At pH 7.2, it is close to 60% active.
Step 5: Shock the Pool
Pool shock means raising free chlorine to a level high enough to kill algae, bacteria, and organic contaminants in a single treatment. For a neglected pool, that means a triple or quadruple shock dose, not a standard weekly shock.
Use unstabilized calcium hypochlorite (cal-hypo) or liquid chlorine (sodium hypochlorite). Do not add more stabilized tablets; CYA is likely already high from prior use.
Safety note: Pool chemical injuries lead to about 4,500 U.S. emergency department visits each year, and over one-third of these preventable injuries are in children or teens. Always add chemicals to water, never water to chemicals, wear goggles and gloves, and shock at dusk to prevent UV from burning off chlorine before it works.
For a 20,000-gallon pool with moderate algae, start with 3 to 4 pounds of cal-hypo (68% or higher) dissolved in a bucket of pool water, then poured around the perimeter. Run the pump continuously.
Step 6: Run, Brush, Repeat
After shocking, brush every surface: walls, floor, steps, and behind ladders. Algae anchor to surfaces; brushing breaks the colony and exposes it to the chlorine in the water.
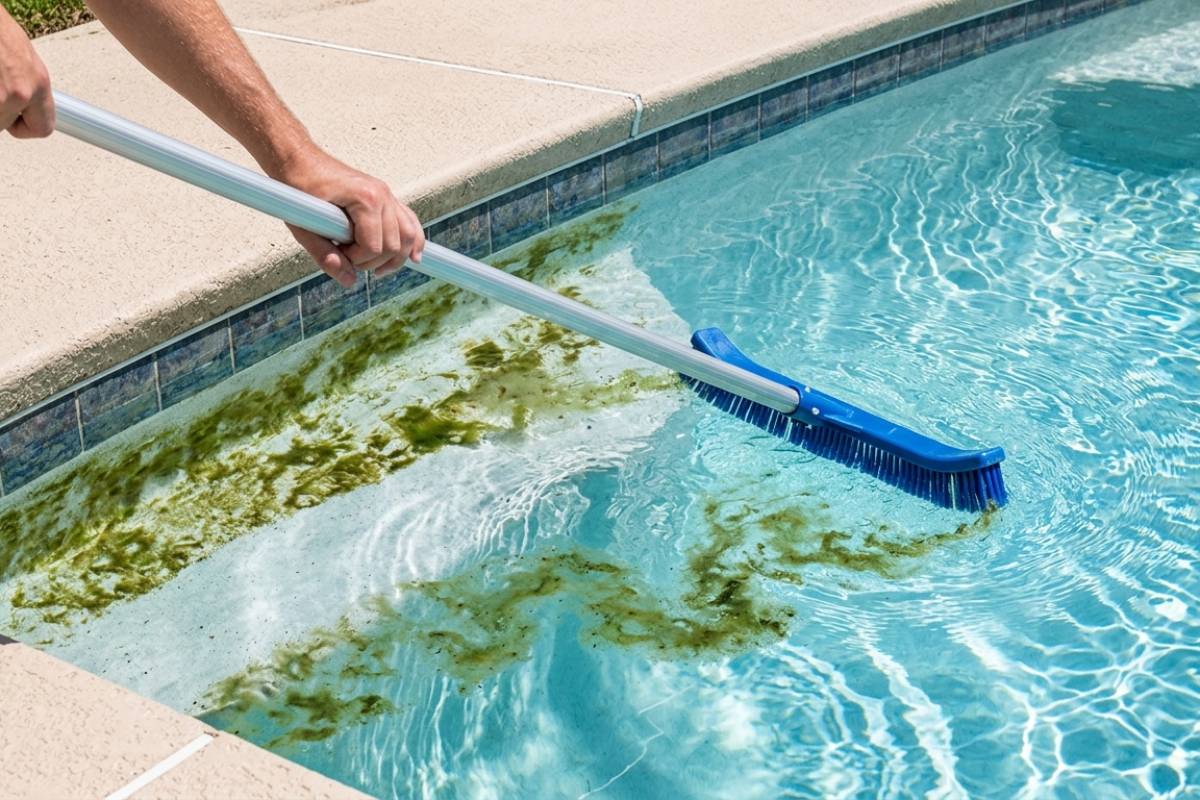
Run the filter 24 hours a day. Check and backwash every 8 to 12 hours during this phase. The filter pressure will spike because it is capturing killed algae and debris. If you ignore the pressure gauge, the filter will short-circuit and push dead algae back into the pool.
Retest chlorine every 24 hours. If free chlorine drops below 1 ppm, re-shock. The pool is not clear until free chlorine holds above 1 ppm on its own for 24 hours without additional dosing.
Step 7: Algae Removal Protocol
Green algae is the most common and the easiest to kill. Shock + brushing + filtration handles most cases within 3 to 7 days.
Yellow (mustard) algae clings to shaded walls, resists chlorine, and reappears after treatment if you do not also treat pool toys, brushes, and accessories that touched the water. It requires a specific algaecide labeled for mustard algae alongside an aggressive shock.
Black algae is the hardest to kill. It forms protective layers and roots into concrete. You need a stainless steel brush (not nylon), targeted spot treatments with trichlor pucks pressed directly onto the spots, and sustained elevated chlorine levels for 10 to 14 days. In severe cases, an acid wash after draining is the only reliable solution.
Step 8: Drain vs. Acid Wash vs. Resurface
If the water is black or dark with zero visibility and you cannot clear it after two rounds of shocking, draining and acid washing is faster and cheaper than continuing to treat the water.
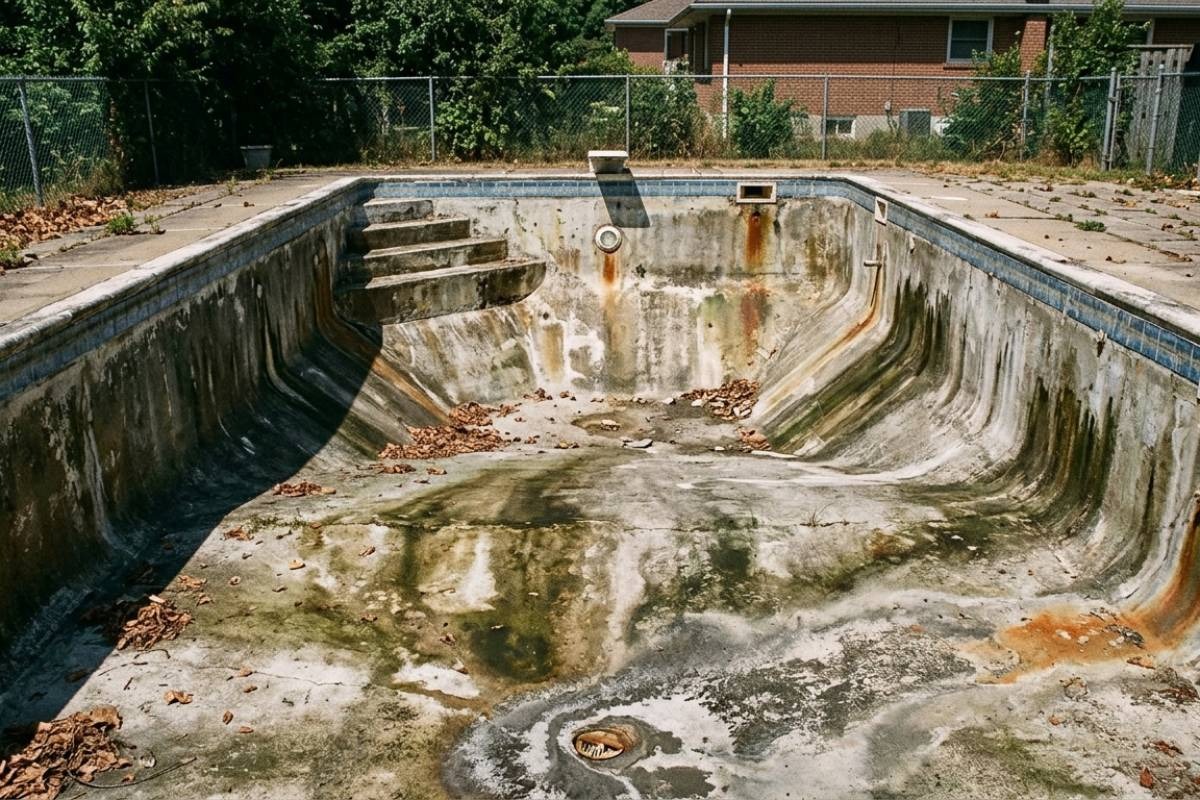
An acid wash removes a thin layer of plaster or gunite along with embedded staining. It is effective but not a permanent fix for structural issues. Each acid wash removes a small amount of surface, so pools can only be acid-washed a limited number of times before resurfacing becomes necessary.
Resurfacing costs between $3,500 and $10,000 depending on pool size and surface material. Specialists such as West Coast Swimming Pool Resurfacing assess whether the existing shell can hold a new coat or whether structural repair must come first.
If chemical treatment fails to clear the water after two full shock cycles, the problem may be structural, and understanding the signs your pool needs renovation rather than restoration will save you weeks of wasted chemical cost.
Step 9: Final Balance and Safety Check
Once the water is clear and chlorine holds steady, run a full chemistry panel and adjust all parameters to their target ranges.
Final targets:
- Free Chlorine: 1 to 3 ppm
- pH: 7.4 to 7.6
- Total Alkalinity: 80 to 120 ppm
- Calcium Hardness: 200 to 400 ppm
- CYA: 30 to 50 ppm
Inspect all drain covers, grates, and suction fittings. SVRS (Safety Vacuum Release Systems) are required by the Virginia Graeme Baker Pool and Spa Safety Act for public pools and recommended for residential. Replace any cracked or missing drain covers before anyone enters the water.
Test pool lights, ladders, and handrails for secure mounting. These fail silently during long periods of disuse.
Step 10: Prevent the Next Neglect Cycle
Test water twice a week during swim season. Catching chemistry drift early costs cents in chemicals versus dollars after it crashes.
Keep a floating chlorinator or an automated chemical feeder to maintain baseline chlorine levels. If you cannot maintain the pool yourself during the off-season, spend the money on a winterization service. A properly winterized pool costs almost nothing to open in spring.
Cover the pool when not in use. A quality safety cover pays for itself by reducing chemical consumption, debris load, and evaporation. It also reduces algae growth by blocking sunlight.
Conclusion
Restoring a neglected pool follows a fixed sequence: assess, clear debris, inspect equipment, test and adjust chemistry, shock aggressively, filter continuously, and verify structural integrity before anyone enters the water. Most pools, even severely neglected ones, can be returned to a safe and clean state with the right diagnosis and systematic treatment. Match the restoration method to the actual condition of your pool, and you will avoid wasting time and money on the wrong approach.